


Five Tips for Better Indoor Photos on Your Phone
With or without being quarantined you often spend a lot of time inside of your home when you have young children. With the recent pandemic we are in, I thought it would be helpful to share my Five Tips for Better Indoor Photos on Your Phone so you can document your children during this time.
I prefer more of a candid style for my photography, especially when you’re indoors capturing your young children. Because lets be honest, how often are your children sitting and smiling all together when inside. So, this is more of tips for a documentary of your children indoors vs a smiling portrait. So let’s dive in!
1. Shoot in live mode
Firstly, If your children are anything like mine, they NEVER stop moving. I prefer to shoot in live mode that way I can review it after select the make “key photo” for whichever frame I think looks best. Just click click click and review after. Maybe give them a game to play, or a book to read or ideally just capture what they are doing in the authentic moment. Be sure to delete the live photos when you are all done as it holds a lot of storage on your phone (you won’t need the originals anyways after you edit it)!
2. Use Natural Light
Though people may think you need to turn as many lights on as you can to get a good image, you actually want to turn off as many artificial lights as possible. Artificial lights make your images orangey. ALWAYS use NATURAL light. Open up blinds, curtains, move items, anything you can do to get as much window light as possible.
3. Timing is key
Capture on days where it is sunny because overcast is really hard to get the lighting you need. I aim to capture photos around 10-11am or 2-3pm for softer light and not so harsh which creates shadows.
I prefer to do side lighting or front lighting. Side light: have your children so they are parallel to the window (be sure their faces are staggered so no one’s face is shadowed.) Front light: have their faces facing towards the window to highlight them more. Play with lighting and see what you like best. Look of your photo can heavily vary based on the time of day, the weather and which direction your windows face.
4. Watch the backgrounds
If you are needing more light in your image, try to put your children up against a solid white wall, door or lay them on a lighter color carpet/rug. Lighter colors help bring in light to the image. If you have tan walls (like I do) it will sometimes make it kind of orangey so I try to place them in front of my white curtains, white door or closet. Try not to have a lot of distractions in the background. You want your children to be the main focus and your eyes to go straight toward them.
5. Editing your images
Taking lighting and location into account when shooting you indoor images is key, but to really put that extra cherry on top, you need to edit them as well. I’m not saying learn how to edit like a professional photographer, but I am saying use the simple tools out there that make a big difference for your photos.
Download Editing app & mobile presets:
Mobile presets are the #1 way to up your photo game! There are a lot of mobile presets out so you can choose which style you like best. I have made my own that I use for my photography and that’s the one I use 95% of the time. I also have (and sometimes use) “Jess Kettle mobile presets” & “VSCO“.
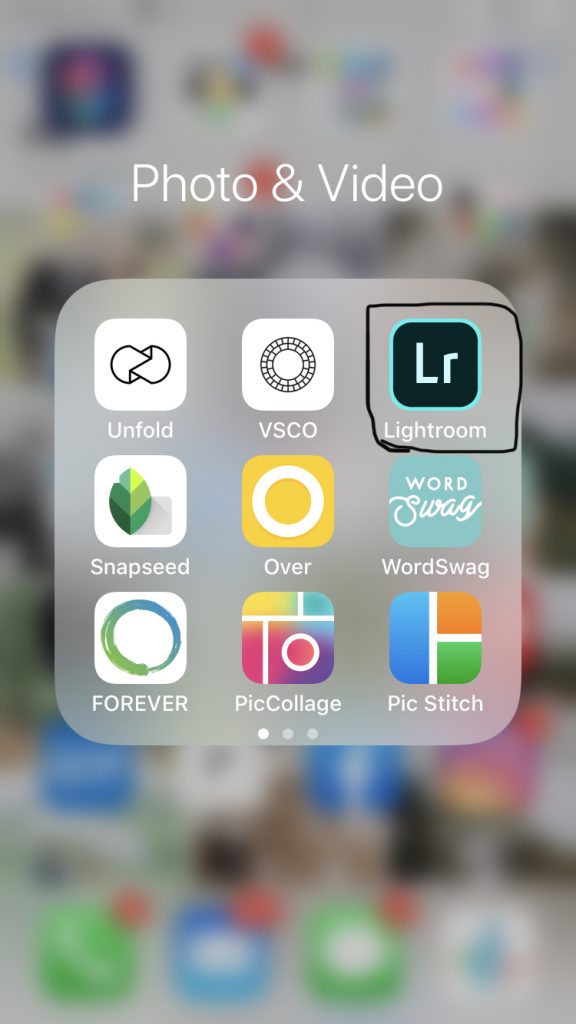
In order to use your mobile presets you will need an editing app like Lightroom or VSCO. I again have both but I now only use Lightroom since that’s how I edit my regular images as well.
Now I am going to walk you through exactly how I mobile edit my iphone images using Lightroom and the Vsco preset I like!
1 . Open Lightroom
2 . Add:
Click add and select which photo or photos you want to edit.
*tip: if you hold your finger down on a photo, it will let you select more than one if you wish to do so
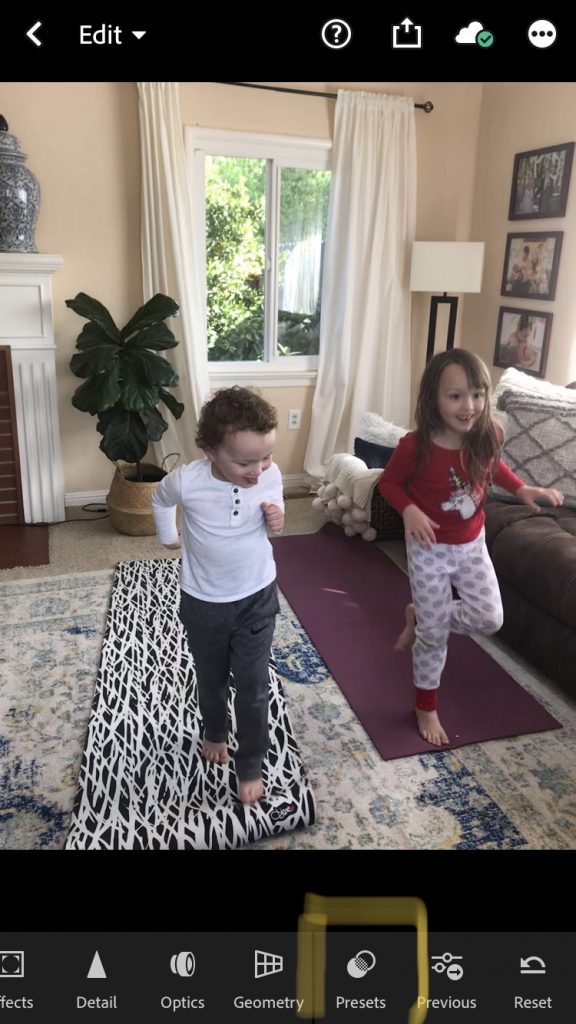
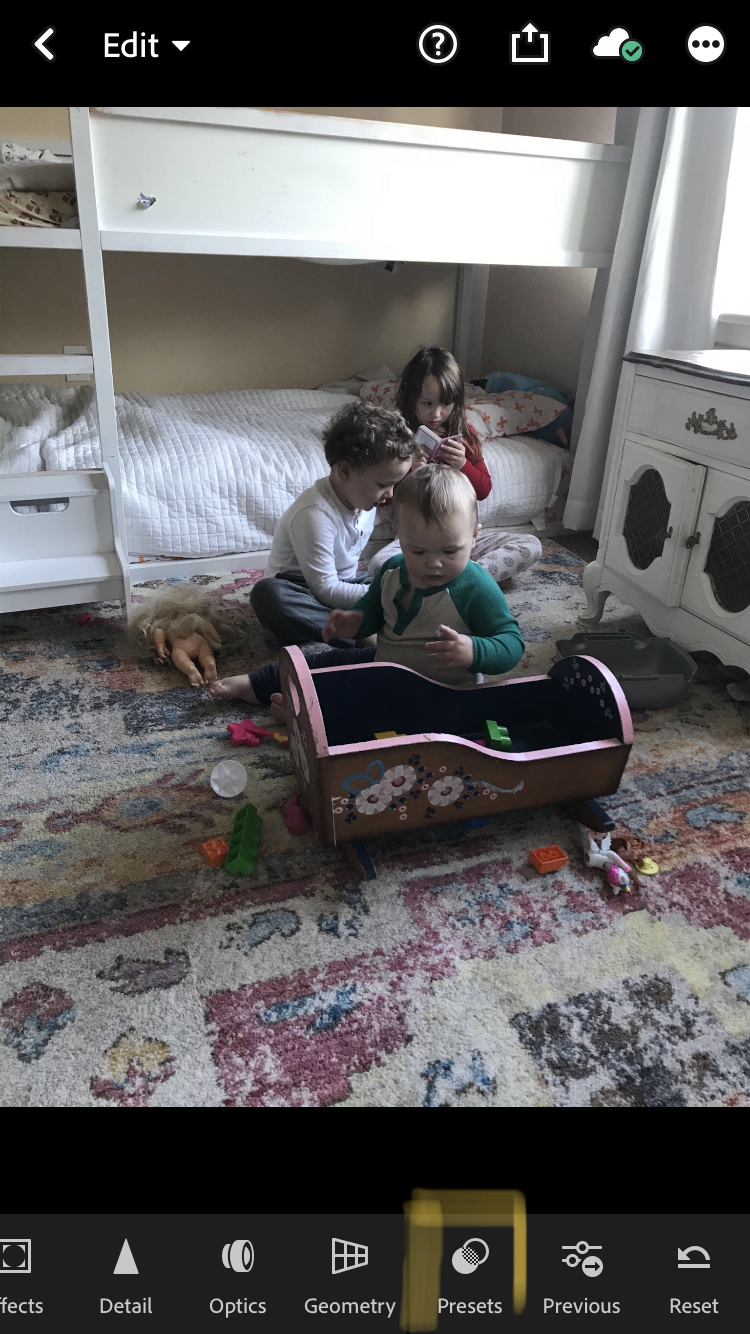
3 . Presets:
Scroll all the way on the bottom icons and click “presets”
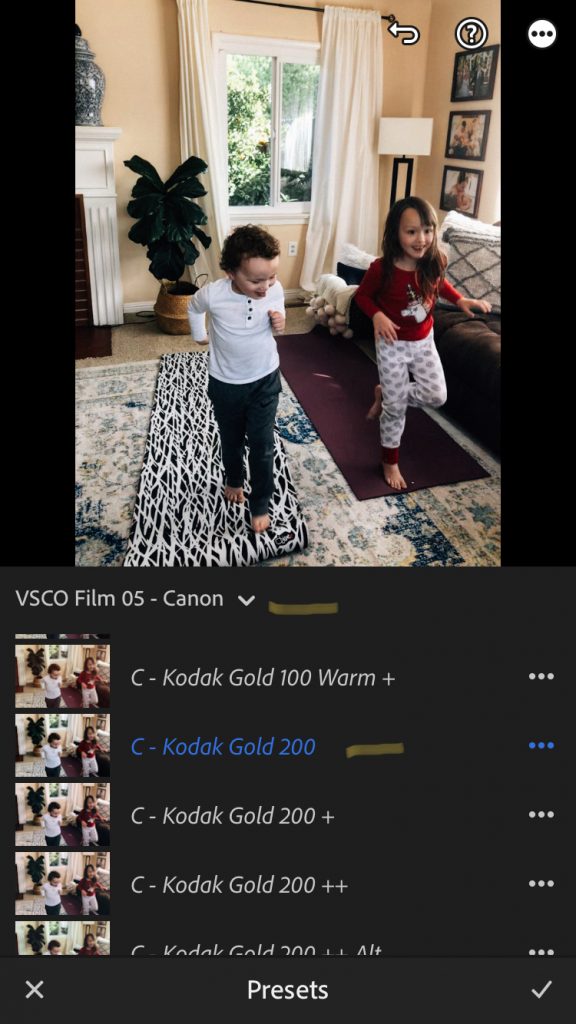
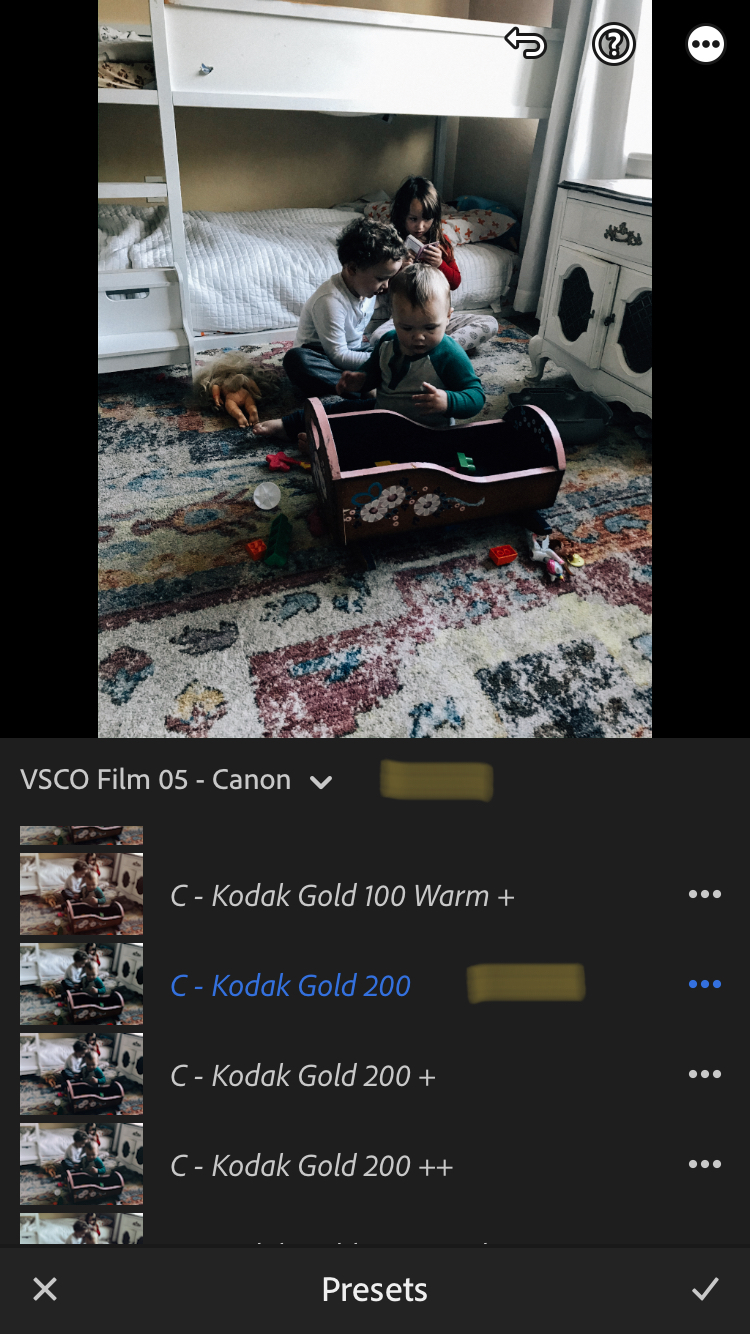
4 . Choose preset:
If you have purchased and imported different mobile preset packs, you will want to click the down arrow by the first highlighted line to choose which pack & preset you want to use. I always VSCO Kodak Gold 200 as it fits best with my liking & consistent style.
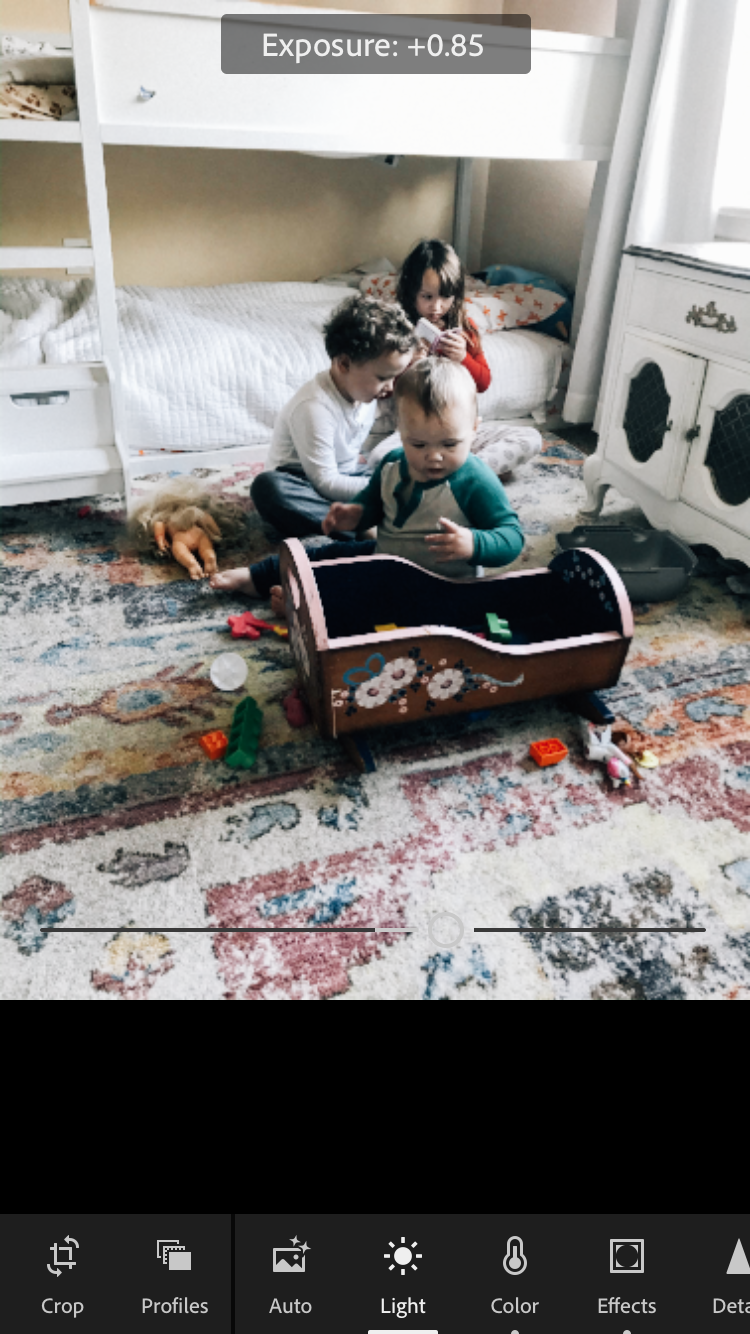
5 . Editing:
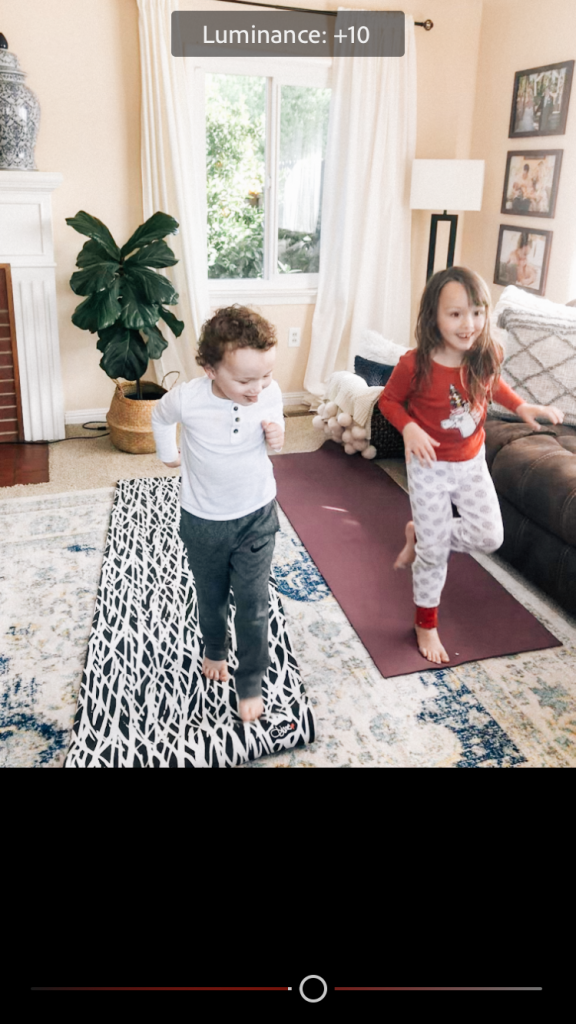
I always start in the “Light” tab and editing my exposure up to where I like it. I increase my exposure to a brightness I like but ensure it’s not too high as I also like to pull up my blacks & shadows for lighting too (more on that below).
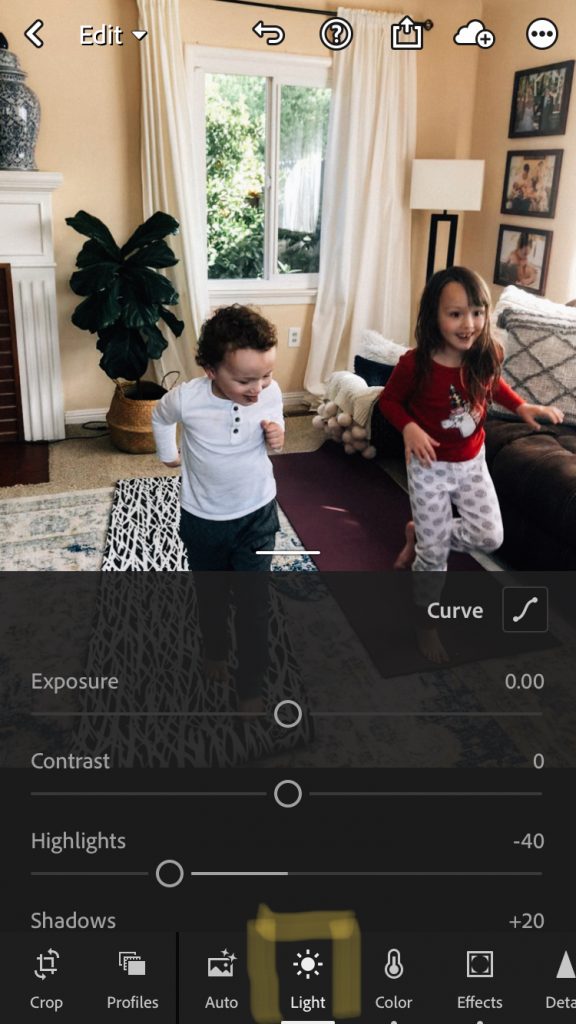
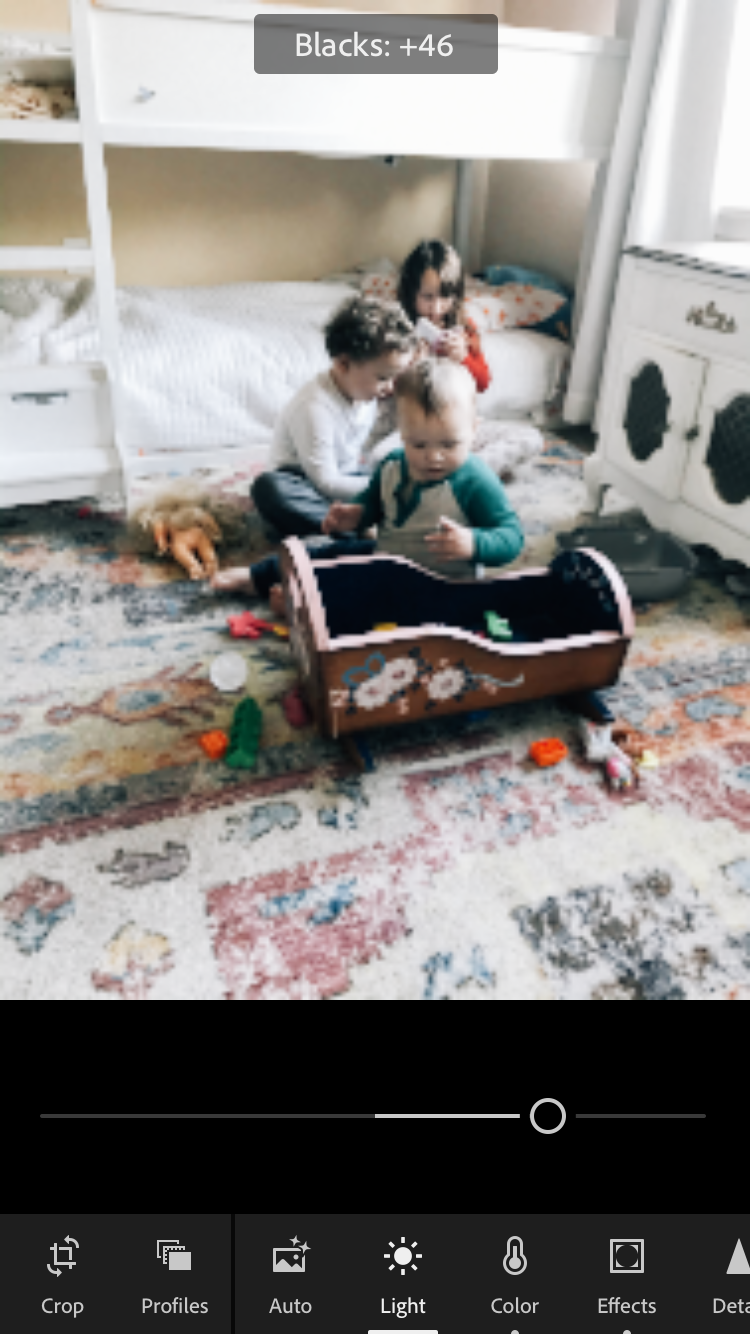
6 . Blacks:
I pull up my blacks to help bring in more light as well, I prefer to pull up the blacks before the shadows to see how it looks and if I even need to touch the shadows.

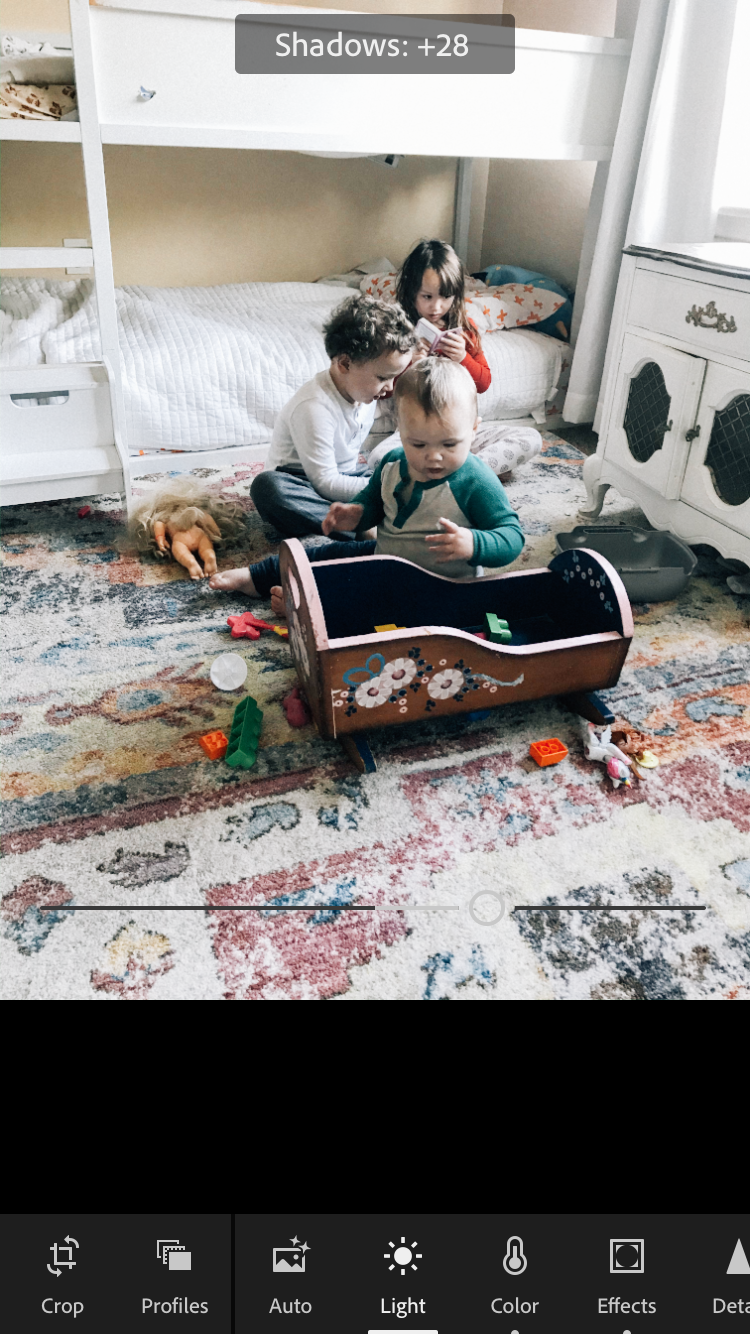
7 . Shadows:
Since this image has a brown couch, dark frames and my children’s hair is dark I wanted to pull shadows up quite a bit to help make it not feel so dark and heavy.
8 . Contrast:
I always pull my contrast below 0 as I love a softer image look. Not too far below but always at least a tad lower.

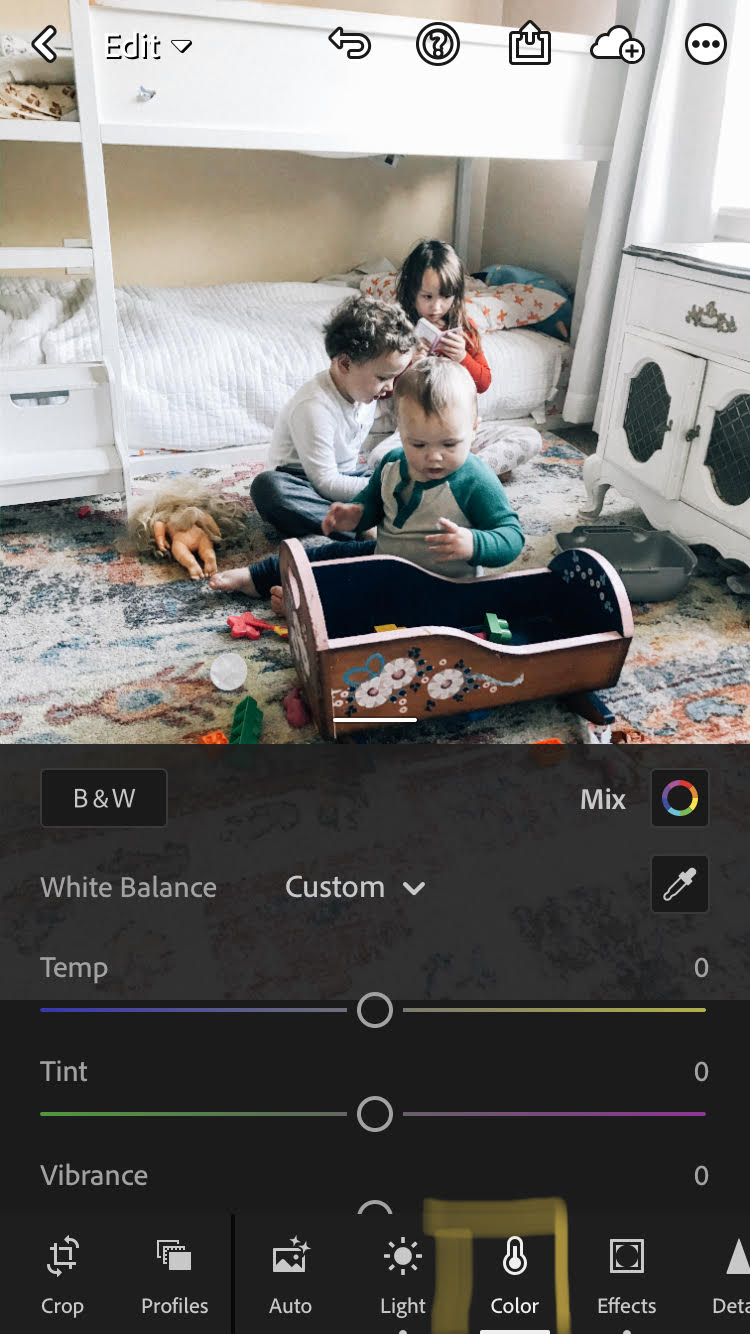
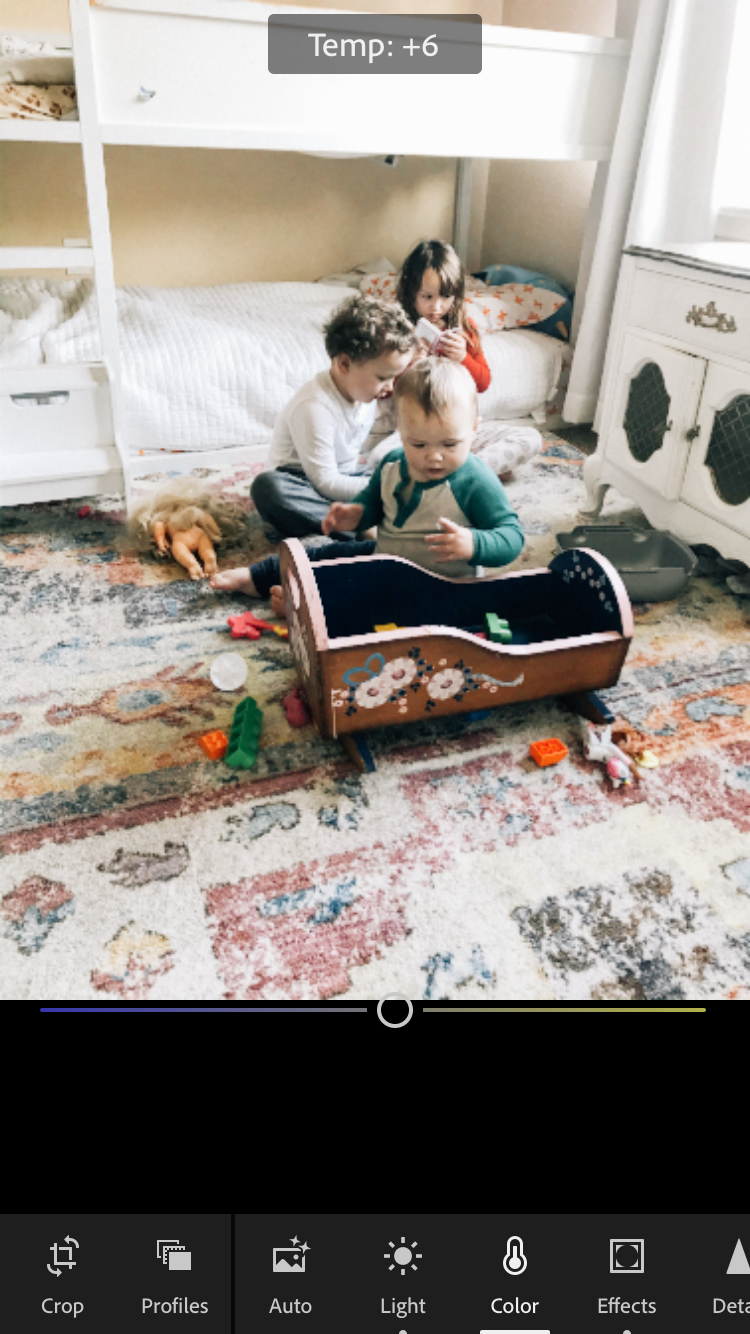
9 . Color/Warmth:
I next would play with the warmth of my image, under the “color” tab…. I normally like my images a tad warmer however in this image the sunlight is warm and the walls are tan so I’m going to leave “temp” at 0 for this image.
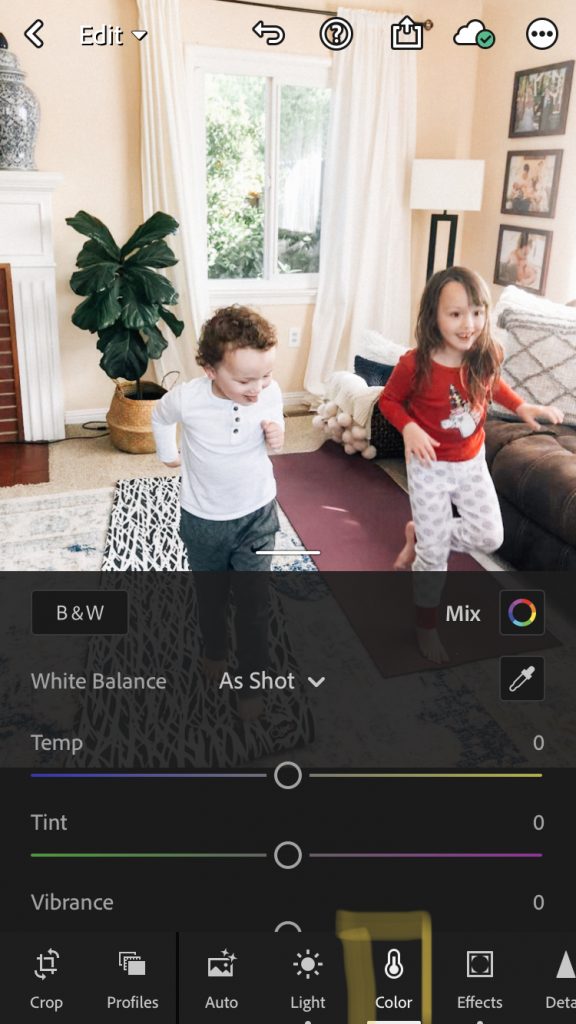
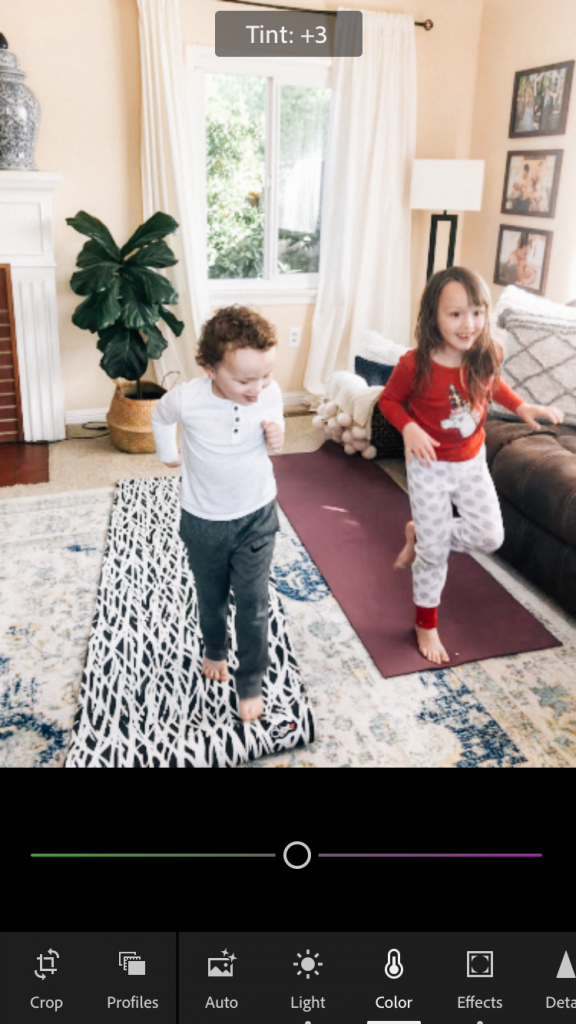
10 . Tint:
The tint slider is used help balance out green & pink tones. I personally love my image to have pink hues in it, similar to film (especially if there are white walls) so I always bring the pink up a bit.
*keep an eye on skin tones when pulling the pink up, you don’t want to change the tint so much that the skin tones look unnatural.
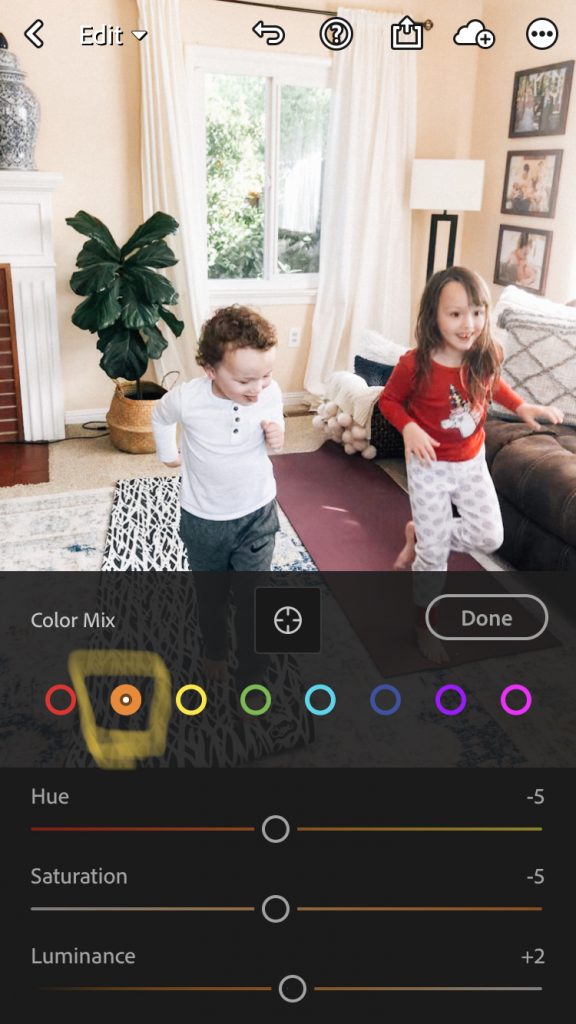
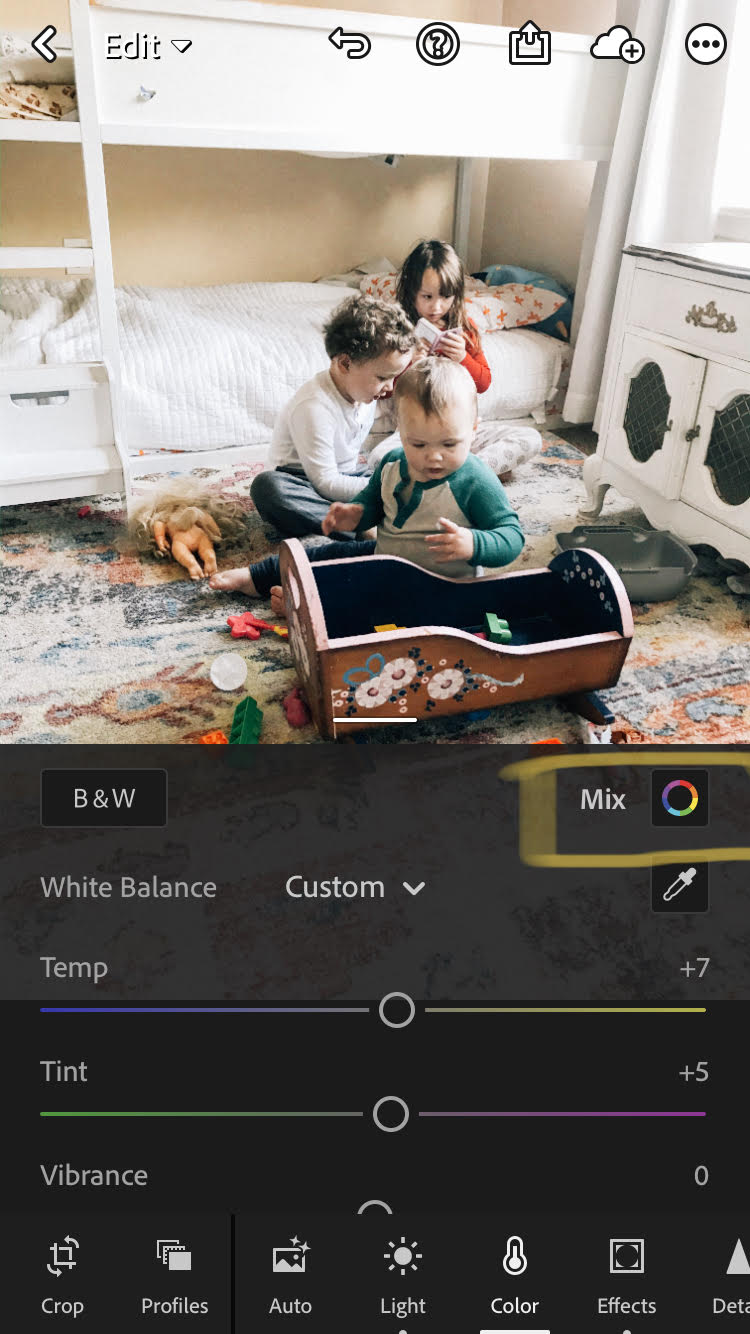
11 . Color Mix:
If there is a color in an image that you don’t like, you can click on “Mix” and drill into a certain color you want to change.

12 . Orange:
Any time I shoot indoors that have tan walls, I always pull the orange saturation down a tad to make them not as orangey looking.
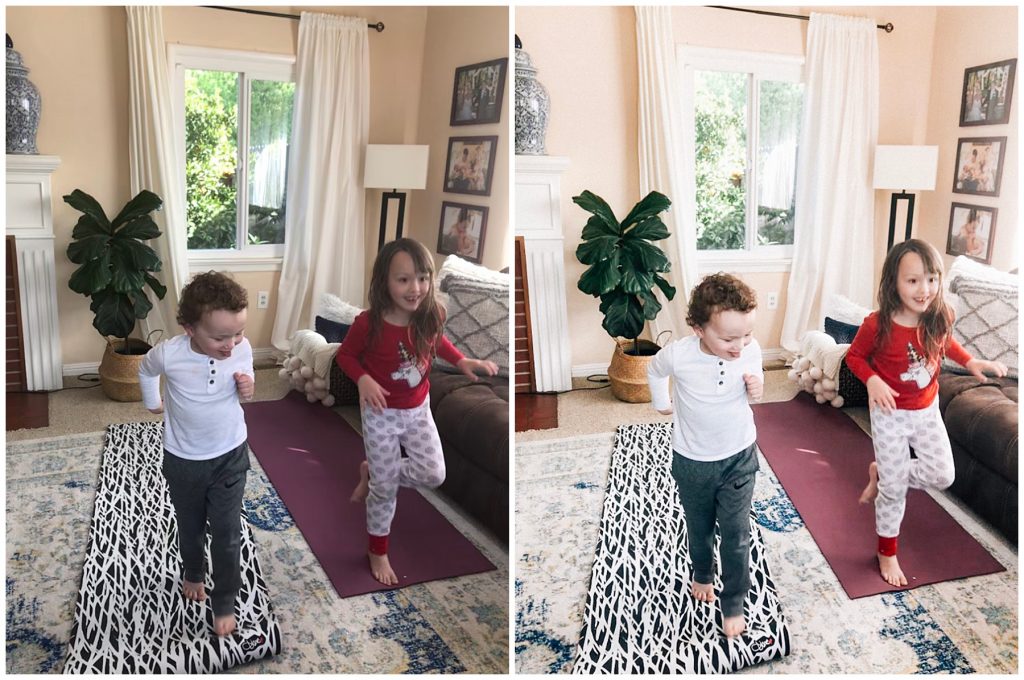
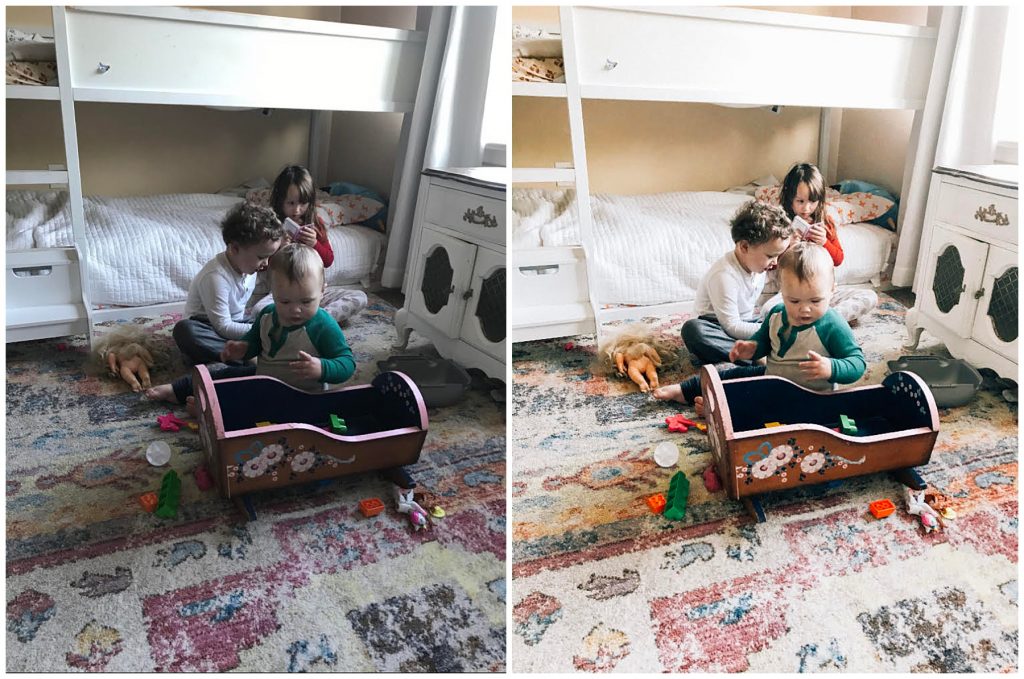
And that’s it! Here is a before and after!
Here is another walk through of my editing with a different image!


This is the before (straight from camera roll) and then the final edit!
If you are interested in learning more, there are tons of youtube videos and instructions out there on how to use these editing apps/presets. Or if you are wanting to get a bit more advanced with your images, try looking into photography tips such as the rule of thirds, negative space and different types of lighting or you are welcome to reach out to me and I am happy to help!
If you enjoyed Five Tips for Better Indoor Photos on Your Phone check out some of my before and after edits on my normal photos here!
Five Tips for Indoor Photos on Your Phone

[…] hope these posing ideas are helpful! Check out my recent post Five Tips for Indoor photos on Your Phone for more tips on capturing your kiddos during this time. You can also check out my “Tips […]